Просмотр новости
Найдите то, что Вас интересует
 Спутники
 РН
РН SpaceX
 Роскосмос
 NASA
NASA
СпутникиРНSpaceXРоскосмосNASAStuck shooting the portrait sessions at the beach? Here are some tips to get your creativity flowing again!
The beach is one of the most demanding locations a photographer can work in — harsh midday light, no shade, constant wind, and clients who aren’t sure whether to squint or smile. Most beach photos look the same because most photographers solve these problems the same way. These 10 tips come from years of shooting weddings, portraits, and creative sessions on the coast. Some are technical. Some are just gear you should have in your bag. All of them will change what you come home with.
Beach photography tips BTS video 1. Add fill light with a reflector
When you place your subjects backlit with the sun behind them, shadows fill in fast and faces go dark. A 5-in-1 reflector solves this without adding flash complexity. Use the silver side for more punch, or layer the white diffusion panel over it to soften the fill. In our sessions, we often reach for the SunBounce because of its size — a bigger reflector means more even coverage across a couple rather than a hot spot on one face.
Position it low and angled upward at about 45 degrees. Your assistant holds it just outside the frame. One reflector, no extra power source, and you go from muddy shadows to clean, flattering light in under a minute.
2. Shoot at sunrise or sunset
Midday beach photography is genuinely difficult. There’s no shade, the light is overhead and harsh, and your subjects will squint in every frame. Sunrise and sunset change everything — the light comes in at a low angle, colors the sky, and wraps around faces rather than flattening them from above.
Honestly, the 30 minutes after the sun drops below the horizon is just as good as golden hour, if not better. Blue hour gives you a cooler, moody sky and soft ambient light that works especially well when you’re adding flash. Stay on location through it. Most photographers pack up too early.
3. Use long exposures for water motion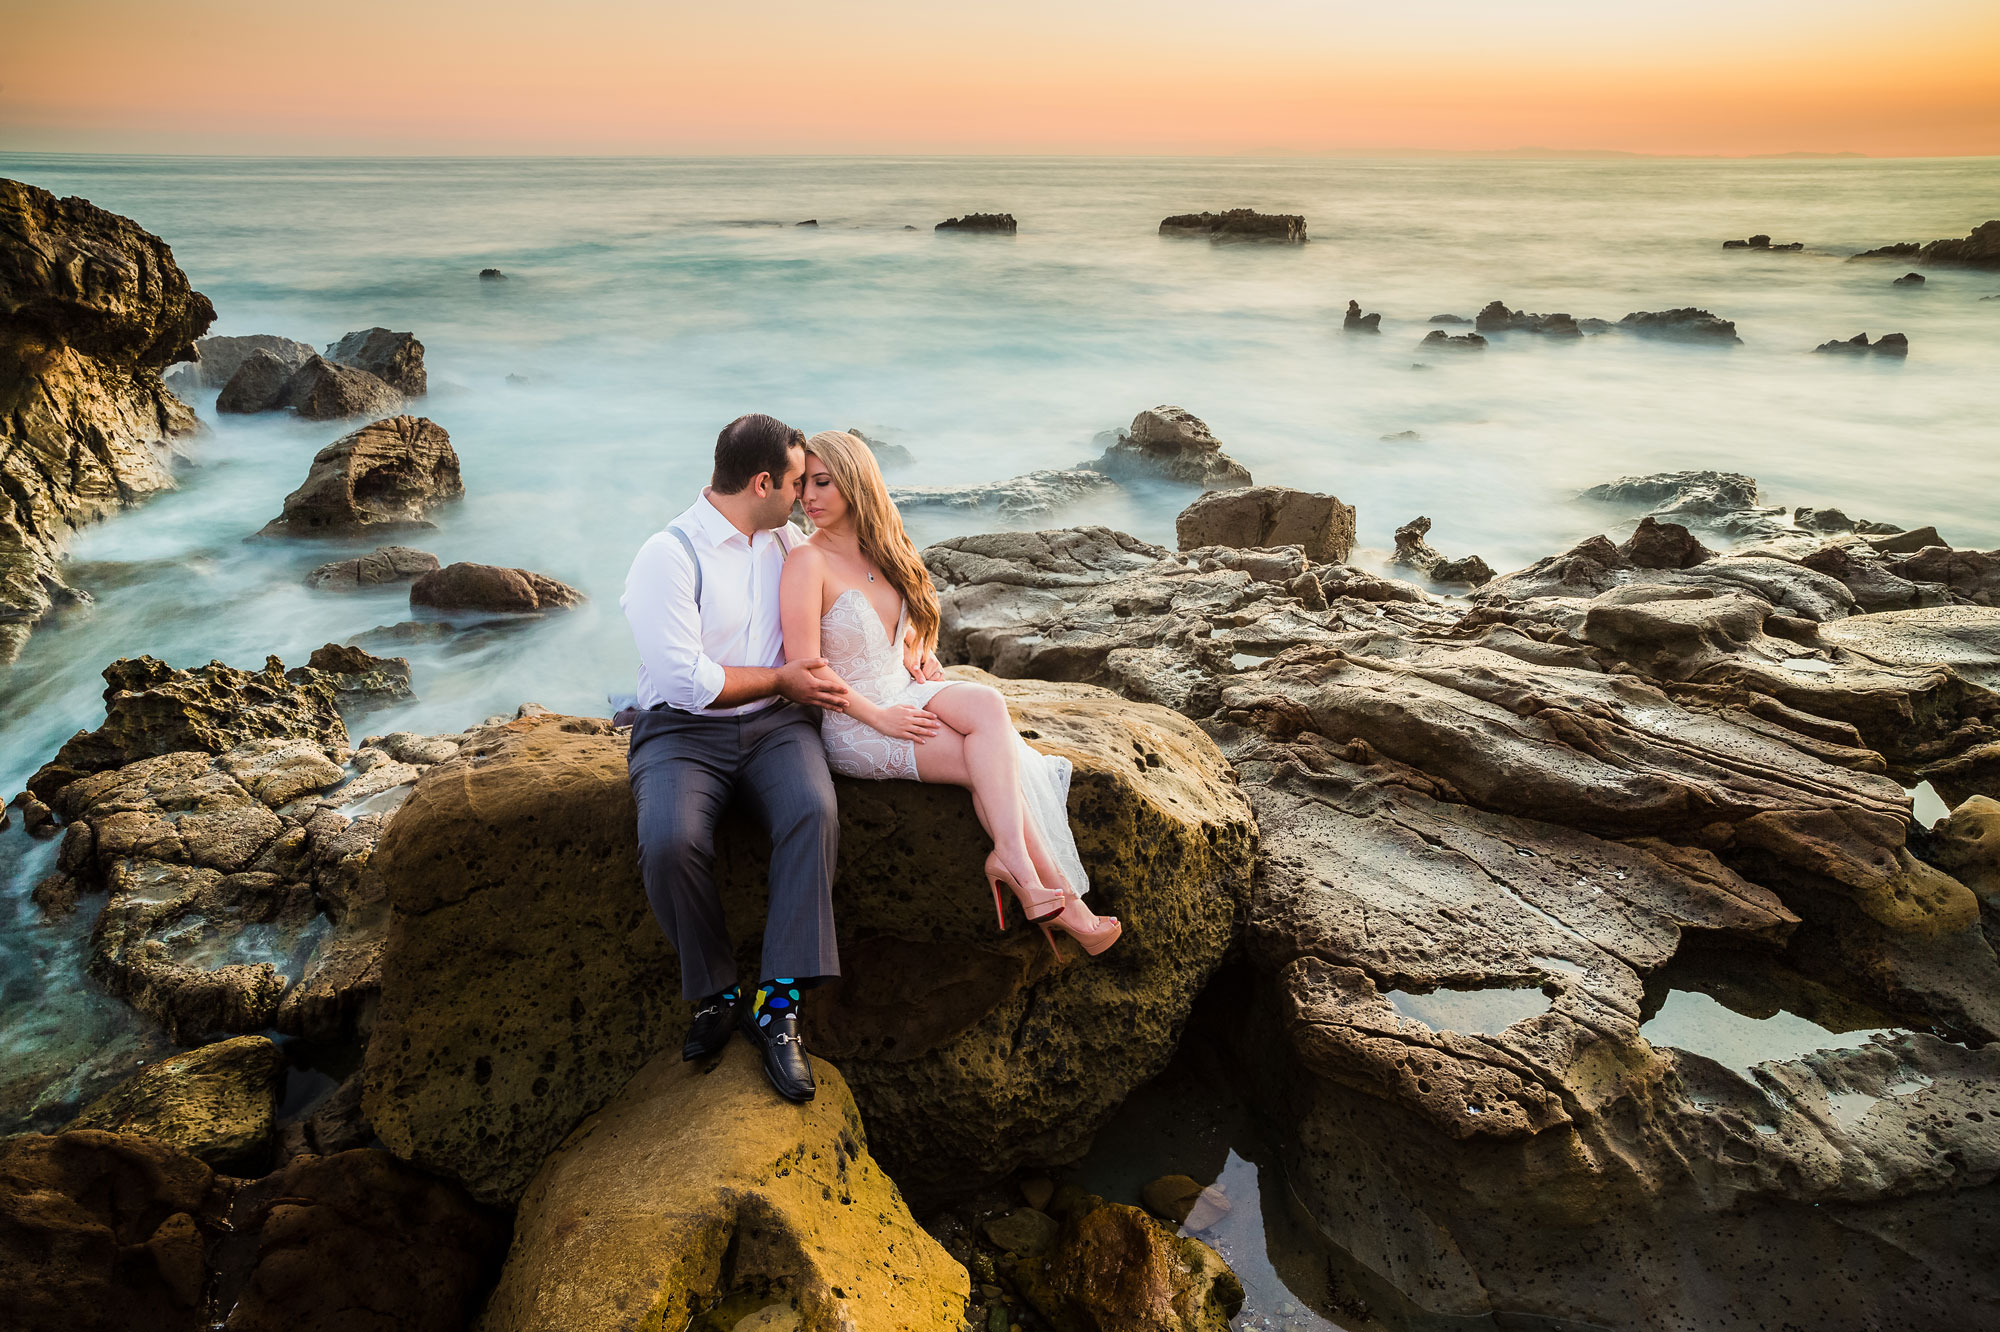
Slowing your shutter to 1/4 second or longer turns the incoming surf into a smooth, flowing layer that separates your subjects from the water without cutting them off visually. This works particularly well for HDR composites and flash-lit shots where you’re already blending exposures for the sky and the couple separately. With subjects placed below the horizon line, the blending becomes much cleaner.
You’ll need a tripod and, on brighter days, a 3-stop or 6-stop ND filter to get your shutter slow enough without blowing the exposure. At dusk, you can often pull it off without one.
4. Add atmosphere with aerosol or ocean mist
The beach gives you natural atmosphere you won’t find in a studio. Ocean mist catches backlight beautifully, especially when you have a flash or strobe behind the couple. Add a small amount of Atmosphere Aerosol on top of what the environment already provides and the effect escalates quickly — you get haze, depth, and separation all at once.
This will get your clients a little damp. Worth it. Let them know ahead of time so they come prepared.
5. Shoot into the night for starry skiesThis one depends heavily on location — light pollution kills it fast, so you need a beach that sits well outside city glow. But if the conditions are there, long exposures at night on the coast produce images that are genuinely hard to replicate anywhere else. The combination of star-filled sky, moving water, and a flash-lit couple is something clients rarely see from any other photographer they’ve worked with.
The video above walks through exactly how we set this up in the field.
6. Create sun stars with a narrow aperture
Before golden hour arrives and you’re stuck shooting in direct sun, put it to work. Set your aperture to f/11 or higher and position the sun just at the edge of your subject or peeking behind them. The narrow aperture causes light to diffract around the aperture blades and form a starburst shape. To keep your subject properly exposed at that aperture, you’ll need a flash or strobe — something like the Profoto B1 that can compete with ambient in full daylight.

Place a flash behind your subjects, aimed toward camera, and you get rim light that separates them cleanly from the background while letting the sky and environment do the rest of the work. This is one of the best entry points into off-camera flash at the beach — the setup is simple (one light, behind the couple, start at 1/8 power and adjust), and the results look significantly more intentional than a straight silhouette.
Keep the flash far enough back that it doesn’t appear in frame. Shoot wide to include the environment.
8. Experiment with color temperature after sunset
After the sun drops, the sky shifts from orange to deep cyan — and that’s when flash color work gets interesting. Dial your in-camera white balance down to around 3600-4600 Kelvin. At that setting, the ambient sky reads as a rich blue. Then add a CTO (color temperature orange) gel to your flash to neutralize the skin tones of your subjects while everything else stays cool.
This is a look you can get in-camera rather than manufacturing it in post. The result is a vibrant, polished image that most photographers don’t attempt at the end of a session when they’re tired. That’s exactly when you should try it.
9. Spray water on your lens for foreground bokeh
A spray bottle costs two dollars and produces foreground bokeh that looks nothing like anything in your normal portfolio. Spritz a few drops on the front element, shoot wide open, and the water droplets become soft orbs of light in the foreground. The size of the bokeh scales with your aperture — the wider you go, the larger the shapes.
One important note: make sure your lens glass is clean before you do this. Wiping water off a dirty lens risks scratching the front element.
10. Find reflections in tide pools and wet sand
The beach gives you reflective surfaces for free — tide pools, wet sand after a wave, shallow standing water at the shoreline. Get low, angle into the reflection, and you get compositional depth that a standard eye-level shot can’t match. The key is stillness in the water. Wait for a moment between wave surges. Any ripple and the reflection breaks up.
This is a technique that costs nothing and requires no extra gear. It just requires you to stop walking and look down.
Bonus: sparklers for long-exposure beach shots
Sparklers and long exposures at the beach are a combination that clients consistently love. The execution takes practice, but the results are hard to replicate with any other technique.
The more you shoot it, the faster you’ll understand how to direct the motion. First attempt will be rough. Third attempt will be a keeper.
Frequently asked questions about beach photography What is the best time of day for beach photography?Golden hour, the 30-60 minutes after sunrise or before sunset, gives you the most flattering light. That said, blue hour, the 20-30 minutes after the sun drops below the horizon, is often better for creative flash work because the sky holds color without overpowering your strobe output.
What camera settings should I use for beach photography?For flash-lit portraits at golden hour, a starting point is 1/200s (your sync speed), f/4-5.6, and ISO 100-200. Adjust aperture to control ambient exposure. For long-exposure water shots, slow your shutter to 1/4 second or longer, use ISO 100, and narrow your aperture to f/8-f/11. An ND filter helps in brighter conditions.
How do I avoid harsh shadows on my subjects at the beach?Shoot with the sun behind your subjects and use a reflector or flash to fill in the shadows on their faces. Avoid placing subjects facing directly into the sun — it causes squinting and overhead shadows under the eyes. Backlit subjects with fill light almost always look more polished than front-lit subjects in direct midday sun.
Do I need a flash for beach photography?Not always, but it opens up a lot more creative options. A reflector handles fill during golden hour without any flash. However, if you want to shoot with the sun in the frame, overpower harsh midday light, or create rim-lit silhouettes, a portable strobe like the Profoto B1 or a speedlight with a trigger becomes genuinely useful.
How do I protect my camera gear at the beach?Salt air and sand are the two main risks. Keep a microfiber cloth accessible to wipe down gear between shots. Store everything in a closed bag when not shooting. Avoid changing lenses on the beach if there’s any wind. After the session, wipe down all metal contacts and external surfaces before packing up. Weather-sealed bodies and lenses help, but they’re not a substitute for basic precautions.
| # | Наименование новости | Тональность | Информативность | Дата публикации |
|---|---|---|---|---|
| 1 | 8 Maternity Photography Tips and Ideas (Updated) | 5 | 6 | 05-07-2026 |
| 2 | Softbox vs Umbrella | Comparing Two Common Lighting Modifiers | 0 | 5 | 06-07-2026 |
| 3 | 3 Beginner-friendly shoot ideas | 0 | 24.29 | 22-06-2026 |
| 4 | Understanding White Balance & Color Temperatures in 8 Steps | 0 | 7 | 10-07-2026 |
| 5 | 10 опасностей моря для туриста | 5 | 7 | 26-06-2026 |
| 6 | 10 Bridal Poses for Wedding Photographers | 0 | 5 | 11-07-2026 |
| 7 | How to upload your film photography to Unsplash | 0 | 6.94 | 28-07-2026 |
| 8 | Demystifying fog: a photographer’s guide to shooting in the mist | 0 | 9.23 | 09-08-2026 |
| 9 | Learn Light Painting Photography (with ANY Camera) | 5 | 7 | 07-07-2026 |
| 10 | Snap decisions: Your simplest guide to buying a vintage digicam | 0 | 5 | 02-07-2026 |